Creating a workflow is the first step in the Chain of Custody process. The workflow establishes all the required steps that users must use to complete the process. Sites can create as many workflows as needed, but most sites utilize between 1-3 workflows.
Permissions Required
ManageCoCWorkflow - Application Administration>Chain of Custody Workflows. Ability to manage workflows
ProtocolSnapshot - Ability to view the Summary page of a Protocol (Protocol Snapshot). Required for all other protocol view permissions.
ProtocolManagement - Protocol Management
EditProtocolDrugsOrders - Drug management for a protocol
Creating A Workflow
To set up a CoC workflow, the user must be able to access Application Administration as well as access the Order build under Edit Protocol on the specific protocol(s).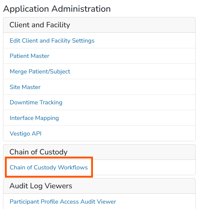
- Navigate to Application Administration
- Click on Chain of Custody Workflows
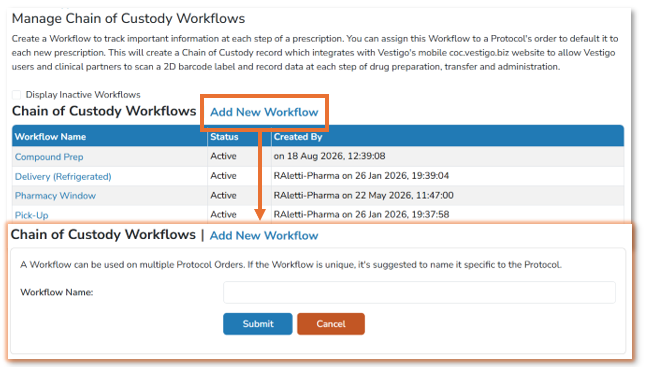
- Click Add New Workflow
- Scroll down and Enter a Name for the Workflow
- Click Submit
Adding Workflow Steps
Once you create the workflow, you can start adding steps to the workflow. Vestigo comes standard with 6 workflow steps below:
- Removed from Fridge
- Withdraw Solution
- Preparation Complete
- Pharmacy Departure
- Clinic Arrival
- Administer Drug
Tip - If sites are needing more unique steps that are specific to the site, they can contact Vestigo Support to add additional workflow steps.
To add steps to workflows:
- Navigate to Application Administration
- Click on Chain of Custody Workflows
- Click on the Workflow Name you want to modify
- Click the Add New Workflow Detail
- Select a Step from the drop down menu
- Check off the boxes of what Scan Types are needed to capture at this step
- Click Save
- For additional steps, follow this same guide from step 4.
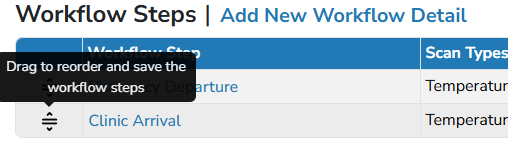
After completion, the steps can be reordered by clicking and dragging a step to the desired position with the mouse.