Transferring inventory to another participant does not impact historical data where the inventory was received under a different participant. Transfers show two transactions on the DARF: one for the transfer out from the original participant assignment, if known, and another for the transfer in to the new participant.
It may be necessary to receive approval from all required parties prior to transferring the inventory between participants. Approval may not be required if transferring to the same participant, but in a different arm. Please check with your site SOPs prior to proceeding.
- Navigate to the protocol.
- Click on the Inventory Tab.
- Click on Immediate Transfer.
- Select the drug from the drop down menu.
Additionally, you can also add a filter by lot number here as well.
- Select Either Single Transfer or Bulk Transfer and follow the appropriate instructions below.
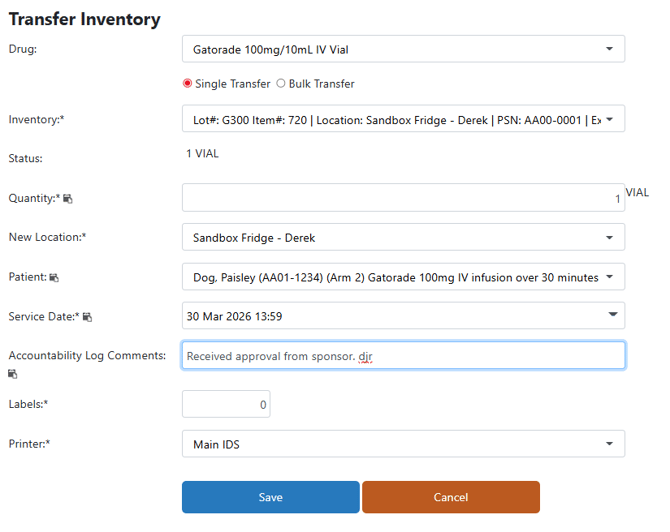
Single Transfer
- Select the Inventory from the dropdown menu
- Enter the Quantity
- Select the Location from the dropdown menu. This can be the same location, or it can be a new location.
- Select the New Participant from the Patient dropdown menu.
In some cases, this selection may be the same participant, but enrolled in a different arm than when the inventory was originally received to that participant.
- If needed, adjust the Service Date.
- It is recommended to add accountability log comments about the transfer.
- If needed, adjust the number of Labels and Printer.
- Click the blue Save button.
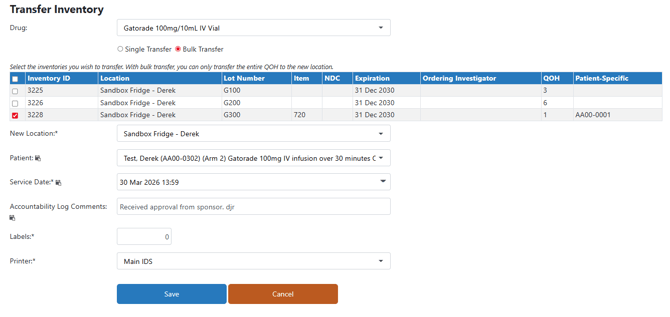
Bulk Transfer
- Select the Inventory from the inventory grid.
Bulk Transfer transfers the current QOH for the associated inventory line item. If you only need to transfer a smaller number, than you should use the Single Transfer.
- Select the Location from the dropdown menu. This can be the same location, or it can be a new location.
- Select the New Participant from the Patient dropdown menu.
In some cases, this selection may be the same participant, but enrolled in a different arm than when the inventory was originally received to that participant.
- If needed, adjust the Service Date.
- It is recommended to add accountability log comments about the transfer.
- If needed, adjust the number of Labels and Printer.
- Click the blue Save button.