Transferring inventory to another location is a common process at sites and Vestigo allows users to perform the function with ease. The transfer shows two transactions on the DARF: one for the transfer out from the original inventory location, and another for the transfer in to the new inventory location.
Note - It may be necessary to receive approval from all required parties prior to transferring the inventory to another location. Please check with your site SOPs prior to proceeding.
- Navigate to the protocol.
- Click on the Inventory Tab.
- Click on Immediate Transfer.
- Select the Drug from the drop down menu.
- Select either Single Transfer or Bulk Transfer and follow the appropriate instructions below.
Single Transfer
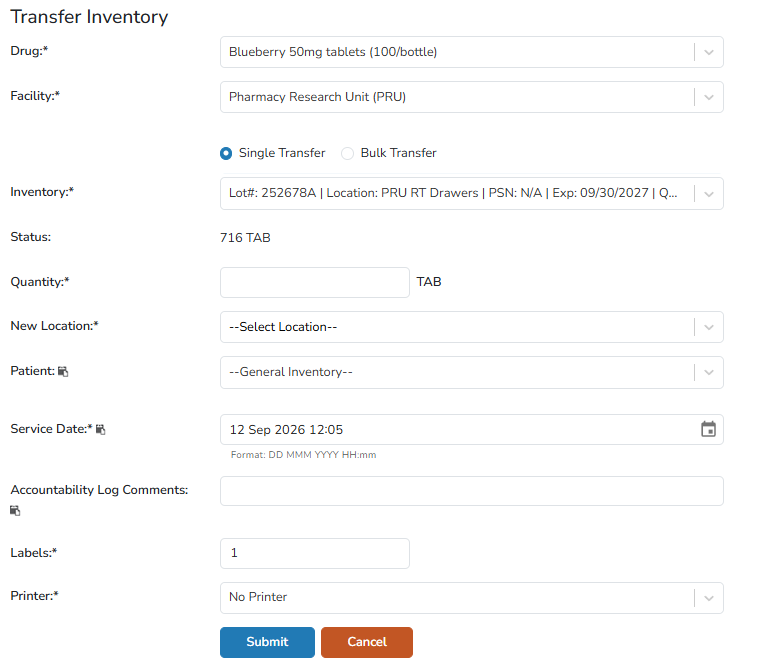
- Select the Inventory from the dropdown menu
- Enter the Quantity
- Select the new Location from the dropdown menu
- Leave the Patient drop down menu as General Inventory, unless you are transferring to a participant
- If needed, adjust the Service Date
- It is optional, but highly recommended to add accountability log comments about the transfer
- If needed, adjust the number of Labels and Printer.
- Click the blue Submit button
Bulk Transfer
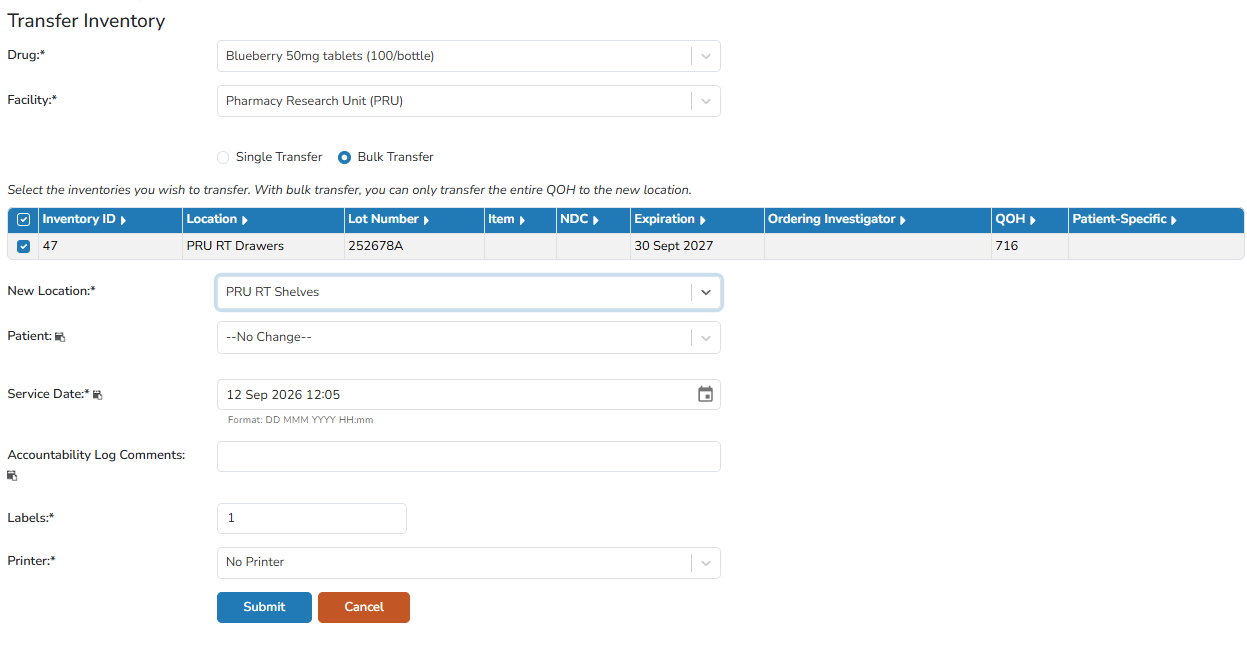
- Select the Inventory from the inventory grid.
Bulk Transfer transfers the current QOH for the associated inventory line item. If you only need to transfer a smaller number, than you should use the Single Transfer.
- Select the new Location from the dropdown menu
- Leave the Patient drop down menu as No Change, unless you are transferring to a participant
- If needed, adjust the Service Date
- It is optional, but highly recommended to add accountability log comments about the transfer
- If needed, adjust the number of Labels and Printer
- Click the blue Submitbutton