
Copy is best used for dispenses where quantity of inventory, dose, and details are exact. This function copies all prescription details fields from the original prescription including refills, prescriber, and accountability comments.
Step 1: Open the Patient Profile
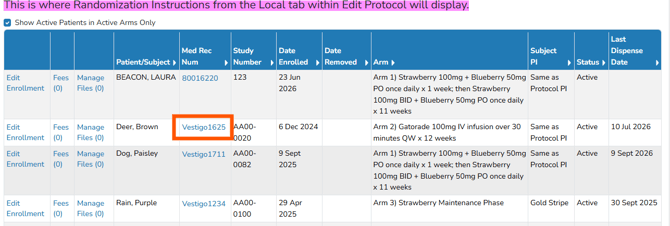
Navigate to the protocol, click on the Patients/Subjects tab and select the Participant’s MRN number.
Step 2: Copy the Prescription
Once you are on the patient/subject profile, locate the prescription want to copy and click Copy.
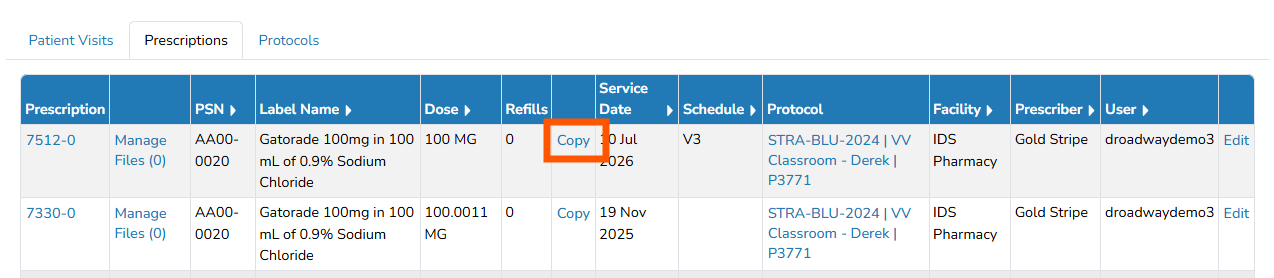
Caution - If the user is no longer enrolled in an arm where that prescription is not available, copying that prescription will not be possible.
Step 3: Select Inventory for A Dispense – Single Full Tracking Drug on Dispense
Since we are copying a prescription, the order field will be locked and can't be modified
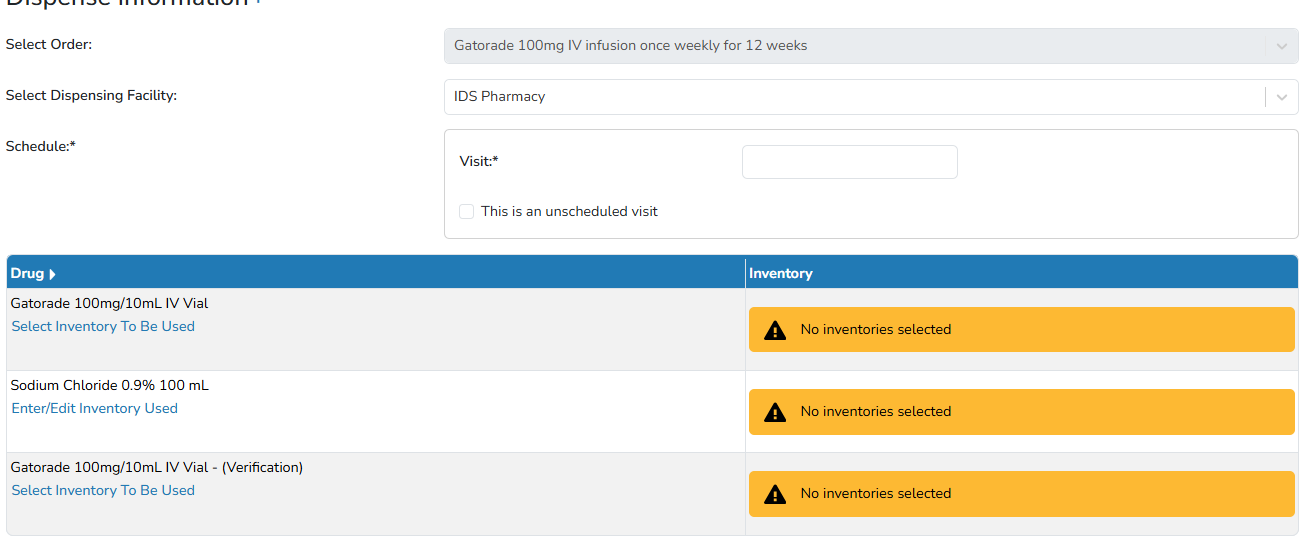
If “Patient Schedule Type” or “Dosing Weight” are required on the Order Build, these need to be entered to continue. If not available, these options can be dismissed by using “This is an unscheduled visit” and “Do not record” checkboxes. You will need to provide a reason for not recording the weight.
The dispensing facility will default to the current facility the user is in, unless that facility is not listed on the protocol. The user will need to select the facility from where the inventory to be used is currently located in. The user will have options to facilities that meet both requirements:
- Are facilities on the study (see Local tab)
- Are facilities where the user has a role (that has dispensing permissions)
Any drug that is Full Tracking and inventory is on hand, not expired, and either General Inventory or indicated as Participant Specific for that participant, will display the available inventory. The user will be prompted to select the link “Select Inventory To Be Used” and enter in the number of inventory units used from the grid of available inventory for this drug.
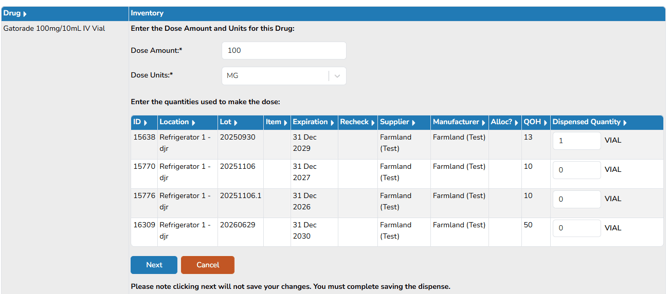
You will be prompted to enter the Dose Amount for the selected inventory. The Dose Units pulls from the drug build and if it needs to be changed, the user can do so, but most often, it will already be set accurately. The dose amount and units pull to the Dose Description, but if the dose needs to be set with a specific format, please use the Default Dose Description field on the Order Build.
Step 3a: Select Inventory for A Dispense - Multiple Full Tracking Drugs on Dispense
The previous steps are the same to dispense using an Order Build with multiple drugs. There are three situations where this may occur to review:
- Multiple drugs on an order but you only need to dispense one drug
- Enter the dose amount/units (units is from the drug build)
- Select the inventory
- Click Save
- Click the link “Complete Prescription with Current Selection” to complete the prescription.
- Multiple drugs on an order but you only need to dispense some of the drugs
- Enter the dose amount/units (units is from the drug build)
- Select the inventory
- Click Save
- Repeat for each drug needed to dispense
- Click the link “Complete Prescription with Current Selection” to complete the prescription.
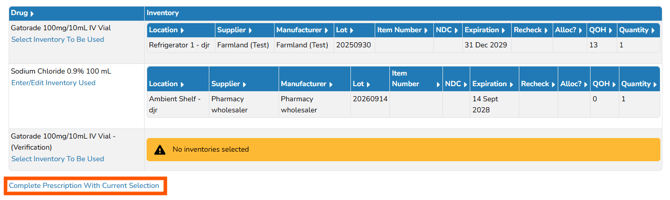
- Dispense all drugs on the multiple drug build:
- Enter the dose amount/units (units is from the drug build)
- Select the inventory
- Click Save
- Repeat for each drug needed to dispense
If multiple inventories are used on the dispense, the Drug Accountability Record (DARF) will represent each drug’s dose as a combination of the Dose Amount, Dose Unit and Dose Description (i.e., 10 mg (rx: 10mg/ml))
Step 4: Prescription Details
Since this prescription is a copy, most values will pull in from the prescription we are copying from, including prescriber and accountability comments. Things like Service Date and any Thaw/Preparation times will still be required to enter. Users will want to make all appropriate modifications to the fields on this screen as needed.
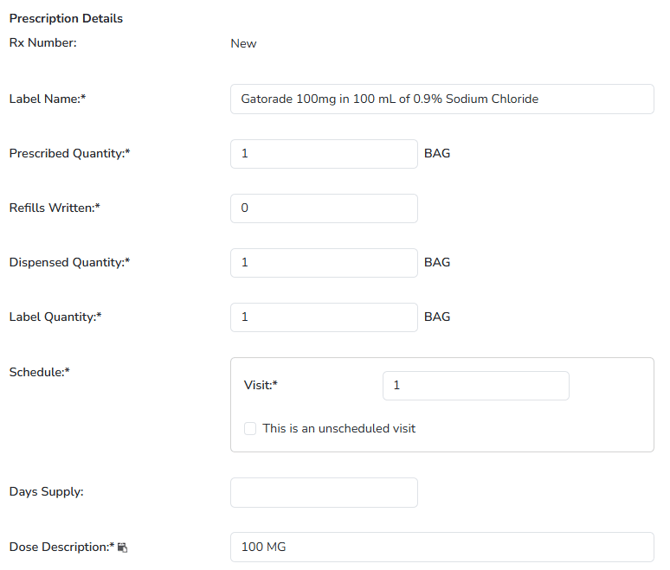
Please reference this section to learn more about each of the fields.
Step 5: Saving the Prescription
When complete, click the blue Save button to save the prescription. The save process does several things concurrently:
- Records the prescription
- Prints the dispensing labels
- Decrements the any full virtual inventories and writes the accountability log entries
- Records any dispensing fees (based on the fee(s) added to the Order build
- Records any cost avoidance savings (if indicated)
- Records the workload (if indicated)
- Saves documents attached to dispense (if added)
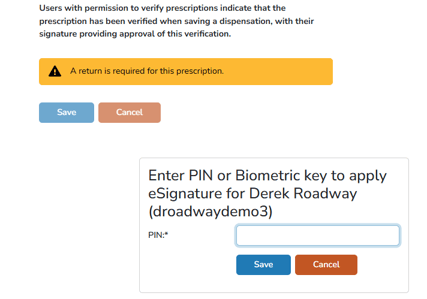
If your site utilizes E-Signature and you are a verifying user, you will need to verify with your Pin or biometric key.
If you need to dispense another order for this participant, select the order from the dropdown and continue. You can return to the protocol by selecting the protocol link at the top right of the screen.
At the bottom of the dispense screen, you have the following additional options:
- You can return to the participant’s profile by clicking the appropriate link at the bottom of the screen.
- You can return to the patient/subject list of the protocol by clicking the appropriate link at the bottom of the screen.
- You can proceed to document return/destruction by clicking the appropriate link at the bottom of the screen.